Why Does My Cabbage Soup Smell Bad? Easy Fix Guide
If your smelly cabbage soup turned out smelling sulfurous and harsh, you are not alone. The harsh smell comes from overcooking the cabbage, which releases sulfur, plus a pot sealed so steam cannot escape. The fix usually comes down to a few small choices you can change next time.
This guide walks through what went wrong, the exact steps that fix it, and the habits that keep it from happening again. Spot the weak step, adjust it, and test the result with a small batch first.
Work through the sections in order, or jump to the fix that matches your batch. For another rescue, see mashed cauliflower fixes and keep building your skills.
Why Cabbage Soup Smells

The strong odor usually builds when cabbage cooks far too long and the sealed lid traps sharp vapor. In my experience, cooks blame the recipe when the real issue is one small habit that is easy to change.
Add the cabbage late, simmer gently for a short time, and keep the lid slightly open so steam escapes. Try the change on a small test batch first, then compare it side by side with your usual method. The difference will tell you whether you found the true cause or only part of it.
Add Cabbage Late
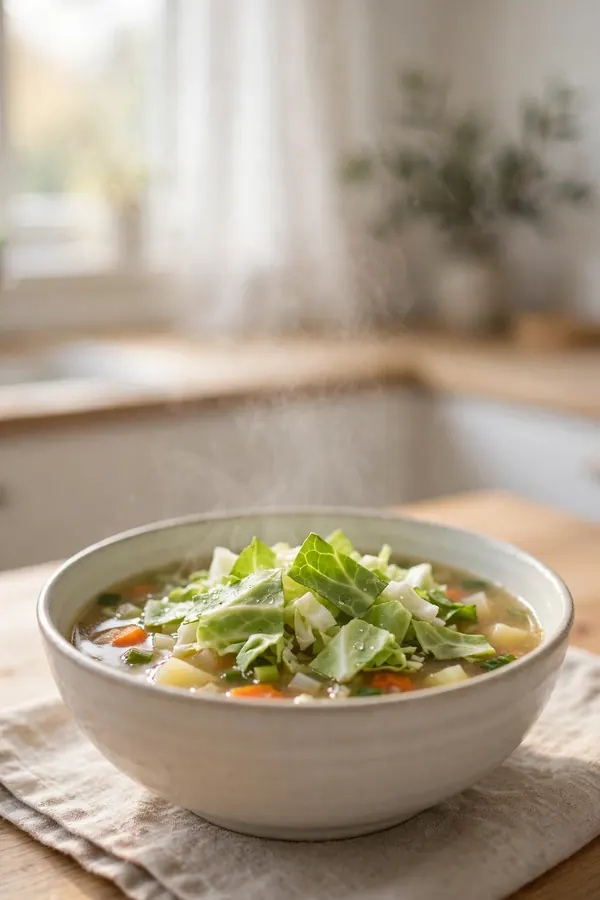
Drop the cabbage in near the end, hold a gentle simmer, and leave the lid cracked so steam can escape. Follow the steps below in order, and give each one your full attention. Rushing the early steps is how the same problem comes back, so slow down where it counts.
- Saute onion and carrot first until soft.
- Add broth, tomatoes, and seasonings.
- Simmer the base for 15 minutes.
- Add cabbage and cook 10 minutes only.
Short Gentle Simmer

Quick Tip: Cabbage should stay a little crisp in soup. If it turns limp and gray, it has cooked too long and the smell follows. Write the tip on your recipe card so you remember it next time.
Long, hard boiling breaks the cabbage down and lets sulfur gather in the pot. Keep the tip in mind while you work, and check the result before you move to the next step. Good cooking is mostly good timing, and a quick pause to look, smell, and taste will catch most trouble early.
Lid Slightly Open

Common Mistake: Many cooks add cabbage at the start and boil the soup for an hour, which breaks the cabbage down and fills the kitchen with sulfur. Leaving the lid slightly open lets the sharp vapor escape instead of building up.
The Fix: Build the broth first, add the cabbage near the end, and simmer gently for only about 10 minutes. Taste near the end and stop simmering as soon as the cabbage turns just tender.
A cracked lid lets the sharp sulfur compounds escape instead of building up in the pot. Keep the simmer gentle, since hard boiling breaks the cabbage down faster and releases more odor. Skim any foam that rises, and add fresh herbs near the end. The soup smells clean, tastes bright, and stays pleasant to serve.
Acid Brightens Everything

What You Need:
- Fresh green cabbage: Smells mild and cooks sweet.
- Carrots and onion: Build a sweet base.
- Tomatoes: Add acid that keeps the soup bright.
- Lemon or vinegar: A splash at the end cuts sulfur notes.
- Good broth: Carries flavor so cabbage stays mild.
Gather everything before you start so you are not hunting for tools mid-recipe. Build the broth first, add cabbage late, simmer briefly, and keep the lid ajar while the pot bubbles softly. A calm, organized setup makes each step easier and keeps the timing on track.
Aromatics First Always

Before: The soup tasted fine, yet the kitchen smelled harsh for hours and the pot gave off sulfur with every ladle. Cooking the aromatics first builds a base that carries the soup without long boiling.
After: With cabbage added late and a short simmer, the same soup smells fresh, light, and appetizing. Aromatics cooked first keep the broth rich while the cabbage stays brief.
Aromatics build the base that keeps the soup from smelling flat or harsh. Cook onion, carrot, and celery slowly until soft before the cabbage goes in. Garlic joins last so it stays fragrant instead of bitter. That layered start gives the broth depth, and the finished bowl smells inviting, not sulfurous.
Fresh Cabbage Counts

Do This:
- Add cabbage near the end.
- Simmer gently for 10 minutes.
- Leave the lid slightly open.
- Add acid at the end.
Avoid This:
- Do not boil cabbage for an hour.
- Do not seal the lid tight.
- Do not use old cabbage.
- Do not reheat at a hard boil.
Short simmer, late cabbage, a cracked lid, and a splash of acid at the end keep the pot smelling fresh. Keep this short list beside you while you cook, and check off each point as you finish it. A simple checklist beats memory when the kitchen gets busy.
Broth Choice Matters

Time Needed: 5 minutes to taste and adjust.
Difficulty: Easy, no extra cooking.
Cost: Only broth and pantry seasonings.
Result: A clean, balanced soup base.
Broth sets the flavor of the pot, so a flat base will show in every spoonful. Choose a light, low sodium broth that lets the vegetables stay fresh. Taste the broth before the cabbage goes in, then adjust salt and acid at the end. A good base keeps the soup mild and bright.
Serve It Fresh

Serving the soup fresh keeps the smell light and the cabbage pleasantly crisp. Ladle the soup as soon as the cabbage turns tender, and leave the pot uncovered for a minute first. Steam carries the last sharp notes away before the bowls reach the table. Guests notice the fresh aroma right away.
Hold back the garnish until serving so the herbs stay bright and fragrant. A squeeze of lemon over each bowl lifts the broth and hides any faint sulfur note. Serve the soup hot, but never let it sit boiling on the burner.
Reheat Without Stink

Reheating is where the smell often returns, so treat leftovers gently. Warm the soup slowly, keep the lid cracked, and use the four moves below in order. Each one keeps the pot smelling just as fresh as the first serving.
- Keep the lid slightly open while simmering.
- Taste and add a splash of lemon.
- Serve at once for the freshest smell.
- Cool leftovers fast and refrigerate.
Final Smell Check

Quick Tip: Lift the lid and sniff the pot before serving, since the first steam tells the truth. If the smell seems sharp, add lemon and simmer one more minute with the lid cracked. Serve only when the steam smells clean and mild.
A final smell check stops a harsh pot from reaching the table. Stand back, lift the lid slowly, and let the steam rise for a few seconds. If the aroma stays mild, ladle the soup at once and garnish each bowl. The kitchen should smell like dinner, not like boiled cabbage.
Conclusion
With these fixes, smelly cabbage soup can turn into a result you are proud to serve. Start with the biggest cause, change one thing at a time, and taste as you go so you know what actually helped. Small, steady adjustments beat a full recipe overhaul, and they teach you how your oven, your pans, and your ingredients behave. If you want one more rescue to study, read these caramelized onions fixes and add them to your baking notes. Keep this guide nearby, trust your senses, and enjoy the next batch.