Why Does My Cake Stick To The Pan After Greasing? Easy Fix Guide
Cake sticking to pan is heartbreaking after a perfect bake. The top looks golden, the smell is wonderful, and then half the cake stays behind in the pan. The causes are usually poor greasing, missing parchment, or a rushed release.
You will learn how to grease and line every pan shape, how long to cool before turning out, and how to rescue a stuck cake without ruining it. The fixes work for round pans, loaf pans, and bundts alike.
Once the routine clicks, every cake will slide out cleanly, and the next guide on muffin batter shows how to mix without turning it tough.
Why Cakes Stick Fast

Cakes stick when batter bakes directly onto bare metal, and sugar is the glue. Sugar caramelizes against the pan, and the crust bonds to the surface as it cools. Dark pans, rough surfaces, and forgotten greasing make it worse, and any one of them can ruin the release.
A stuck cake is rarely a recipe failure. It is almost always a pan prep failure, which means it is fully preventable. A few minutes of prep before baking saves the whole cake every time. Grease, line, and cool with care, and the cake will slide out whole.
Greasing Methods That Work

Greasing is a full coverage job, not a quick swipe, and corners matter most. Miss one corner and that corner will hold on. Use soft butter or shortening, reach every ridge with a brush, and dust with flour. Follow these steps for full coverage that releases cleanly.
- Rub soft butter or shortening over every surface, including corners and seams.
- Use a pastry brush to reach ridges in a bundt pan.
- Dust with flour and tap out the excess, or use a baking spray with flour.
- Line the base with parchment after greasing for double protection.
Parchment Paper Tricks

Quick Tip: Cut a parchment round for the base of every round pan, and grease the parchment too. The round peels off cleanly and guarantees a smooth bottom.
For loaf pans, use a parchment sling with overhang on the long sides. The sling lifts the cake out in one motion, with no prying or flipping. It is the single best trick for quick breads and pound cakes, and it works for bars. Grease under the sling, and the cake will lift out cleanly.
Flour Versus Cocoa Dusting

Common Mistake: Many bakers dust chocolate cakes with white flour. The flour leaves pale patches on the dark crust, and the cake looks dusty and unfinished.
The Fix: Dust chocolate cakes with cocoa powder instead of flour. The cocoa blends into the crust and adds a little extra chocolate flavor.
For vanilla cakes, flour is fine, and the pale dust blends in. For anything dark, cocoa keeps the finish clean. Either way, tap out the excess so no thick patches bake onto the crust. A light, even coat is all you need, and the cake will release cleanly. The finish will look professional.
Pan Materials Compared

What You Need:
- Pastry brush: Reaches every ridge and corner with an even coat of grease.
- Parchment paper: Lines bases and lifts cakes out cleanly.
- Baking spray with flour: A fast all in one option for simple pans.
- Wire rack: Lets steam escape so the base does not glue itself to the pan.
- Thin knife: Loosens edges without tearing the crust.
Keep parchment and a brush within reach of your baking shelf. When the tools are handy, you will never skip the prep that saves the cake. Store the parchment, brush, and spray together, so prep takes seconds. The habit saves more cakes than any recipe tweak ever will. Make prep the first step.
Cooling Before Release

Before: Before, I greased pans in a hurry and skipped the parchment. Half of every cake stayed behind, and I served lopsided slices with apologies.
After: After greasing fully, lining the base, and cooling on a rack, the same cakes slide out whole. The bottoms look smooth and professional.
The prep takes three minutes, and it pays off in every slice. The payoff is a cake that looks as good as it tastes, every single time. Grease fully, line the base, and cool on a rack before turning out. Keep the routine steady, and whole cakes follow every time.
Loosening Stuck Edges

Do This:
- Grease every surface, including corners and seams.
- Line the base with parchment.
- Cool in the pan for 10 to 15 minutes.
- Run a thin knife around the edge before turning out.
Avoid This:
- Do not turn out a cake straight from the oven.
- Do not leave a cake in the pan until fully cold.
- Do not pry a stuck cake with a fork.
- Do not skip greasing for nonstick pans.
These habits cover every pan shape, from round to bundt. Once they are routine, stuck cakes become a rare event instead of a regular one. Grease every surface, line the base, cool in the pan, and run a knife around the edge. Repeat the routine, and clean releases follow every time.
Saving A Torn Cake

- Time Needed: About 3 minutes of pan prep.
- Difficulty: Easy, mostly habit.
- Cost: Parchment and butter only.
- Best For: Round, loaf, sheet, and bundt pans.
Light metal pans bake more evenly than dark ones and stick less, so choose light pans when you can. Glass pans hold heat longer, so cool them a little more before turning out. Even nonstick pans benefit from a light grease and parchment base. The right pan plus good prep gives a clean release.
Bundt Pan Release Secrets

If a cake sticks, do not force it, since force tears the crust. Set the pan on a damp towel for five minutes, then run a thin knife around the edge. The steam loosens the bond without tearing the crust, and patience saves the cake from damage.
If the base still holds, warm the bottom of the pan over low heat for 30 seconds, then try again. Gentle heat melts the sugar bond and lets the cake release. Work gently, and the cake will slide out whole. A little heat beats a lot of force.
Serving Without Crumbling

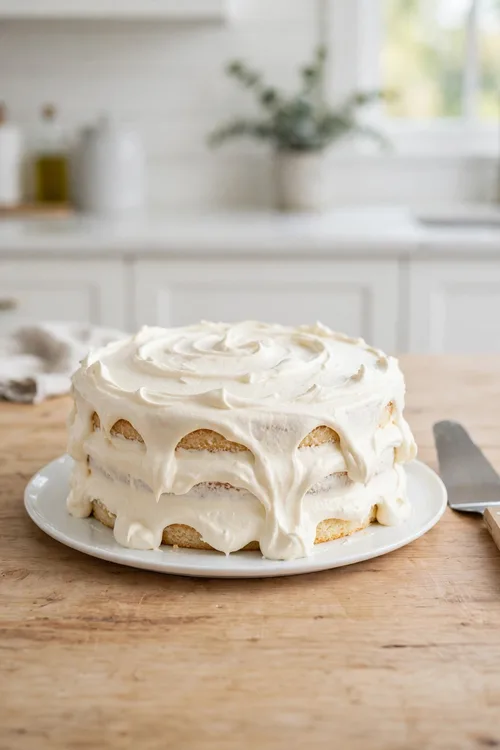
A torn cake is not a lost cake, and a little creativity hides the damage. Frosting, fruit, and clever cutting hide almost any damage. Patch torn spots with frosting, trim ragged edges, and turn the damaged side down. Follow these steps to rescue a torn cake and serve it proudly.
- Patch torn spots with frosting and chill until firm.
- Trim ragged edges with a sharp serrated knife.
- Turn the damaged side down on the plate.
- Cover flaws with fruit, crumbs, or a dusting of cocoa.
Sticking Prevention Checklist

Quick Tip: For bundt pans, brush every ridge with shortening and dust with flour or cocoa. Cool the cake for exactly 10 minutes, then invert it onto a rack in one confident motion.
Bundt pans punish rushed prep more than any other shape, so take your time. Brush every ridge with shortening, dust with flour or cocoa, and cool for ten minutes. Invert the pan in one confident motion, and the cake will release in one beautiful piece. The ridges demand patience and full coverage.
Conclusion
A cake that releases cleanly is a small victory worth celebrating. Remember that cake sticking to pan trouble starts with poor greasing, missing parchment, or a rushed release. Grease every corner, line the base, and let the cake cool for ten to fifteen minutes before turning it out. If an edge sticks, loosen it gently with a thin knife and patch any tear with frosting. With these habits, your cakes will come out whole and ready to serve. For the fix that came before this one, see our buttercream guide for a firm, pipeable finish.