How To Fix Tough Rubbery Fried Eggs? Easy Fix Guide
If your rubbery fried eggs bounce back when you cut them and chew like erasers, you are not alone. Many home cooks face this same morning letdown, and the good news is that tender eggs take only a few small changes.
The usual cause is heat that runs too high. A screaming hot pan tightens the proteins fast, so the whites turn tough and the yolks go chalky. Gentle heat and short cooking keep the eggs soft.
This guide walks you through each fix in order, from pan heat to timing and serving, so your next eggs turn out tender with soft, glossy yolks. For a dessert rescue next, read the chocolate mousse fixes for a silky smooth spoon after this one.
Why Fried Eggs Tough

Eggs turn tough when their proteins cook too fast. High heat squeezes water out of the whites, leaving them firm and squeaky instead of soft. The edges brown and curl while the center is still raw. A screaming hot pan seizes the whites before the yolk warms.
A cold pan start is not the answer either, since the eggs spread thin and stick. In my experience, the sweet spot is a pan that feels warm, with butter just melted and foaming softly. Warm butter and a calm flame give the whites time to set softly.
Use Low Heat

Low to medium low heat is the whole secret. The whites should set slowly, with only tiny bubbles at the edges. Warm the pan over medium low until the butter foams softly. The whites should spread gently, not sizzle hard, when they hit the pan.
- Set the burner to low or medium low and let the pan warm for one minute.
- Hold your hand above the pan. It should feel warm, not blazing.
- If the butter browns at once, the pan is too hot. Let it cool for a minute.
- Cook the egg slowly and watch the white turn from clear to opaque.
Pick Fresh Eggs

Quick Tip: Crack each egg into a small bowl first. Fresh eggs have tall yolks and thick whites that hold together, while older eggs spread thin and cook unevenly.
The bowl also keeps shell bits out of the pan. If a yolk breaks, save that egg for scrambling and fry a fresh one. A whole yolk cooks more evenly and stays soft inside. Crack into a cup first, so shell bits never reach the pan.
Butter The Pan

Common Mistake: Many cooks pour eggs into a dry pan or use too little fat. The whites stick, tear, and overcook while you try to free them.
The Fix: Melt one teaspoon of butter per egg and swirl it across the pan. The fat cushions the whites, adds flavor, and lets the egg slide free when it is done.
Butter should foam softly, not turn brown. If it browns, wipe the pan and start fresh. Clean butter gives the eggs a sweet smell and a tender texture. If the butter browns, wipe the pan and start with fresh butter. Browned butter tastes bitter and sets the eggs too fast.
Cook Whites Gently

What You Need:
- Heavy pan: Holds steady low heat and stops hot spots that toughen the whites.
- Butter or oil: Coats the pan so the eggs cook gently and release cleanly.
- Small bowl: Holds each egg for cracking and checking before it reaches the pan.
- Spatula: Lifts the egg gently without tearing the white.
- Lid: Traps steam to set the top without flipping.
A heavy pan matters more than a big one. Thin pans spike hot in seconds, while a heavy pan stays calm and even on low heat. A heavy pan holds steady heat, while a thin pan spikes hot and cold. Steady heat is what keeps the whites tender.
Cover For Steam

Before: Before the fix, the eggs hit a smoking pan and seized up at once. The whites turned brown and leathery, and the yolks went hard.
After: After the fix, the eggs slide into warm butter and set slowly. The whites stay white and tender, and the yolks stay glossy and soft.
Covering the pan for the last minute is the gentle way to set the top. Steam finishes the white without flipping, so the yolk stays soft and unbroken. Covering the pan for the last minute sets the top without flipping. The trapped steam finishes the whites while the yolk stays soft.
Time The Yolk
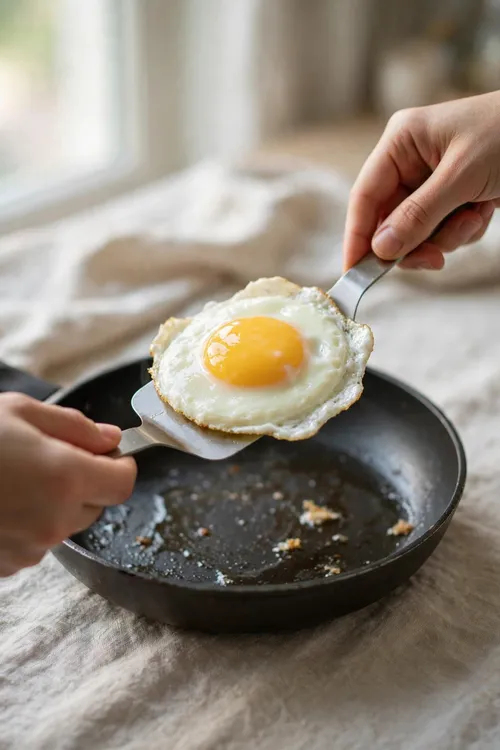
Do This:
- Watch the white, not the clock, since eggs vary in size.
- Lift the edge gently to check that it has set.
- Slide the egg onto a warm plate the moment the white is opaque.
Avoid This:
- Do not press the egg flat with the spatula.
- Do not leave the egg in the pan while you set the table.
- Do not flip unless you truly want a firm yolk.
Eggs keep cooking on the plate, so pull them a touch early. A white that looks just set will finish perfectly in the seconds before you sit down. Pull the eggs a touch early, since they keep cooking on the plate. A minute of rest firms the whites without toughening them.
Season After Cooking

Time Needed: About 2 to 3 minutes per egg on low heat.
Difficulty: Easy, once the pan stays at a gentle warmth.
Cost: Low, since the fix uses heat control and butter.
Best For: Breakfast plates, toast toppings, and rice bowls.
For a runny yolk, cook about two minutes with the lid on for the last thirty seconds. For a just set yolk, add one more minute and watch the yolk turn from glossy to matte. Serve on a warm plate with toast, so the eggs stay soft to the last bite.
Rescue Tough Eggs

Tough eggs can still be used well. Chop them and fold into fried rice, or slice them over a warm salad. The other ingredients soften the texture and hide the chew. Chopped eggs folded into warm fried rice disappear into the dish and stay soft in the sauce.
Another rescue is a quick sandwich. Layer the sliced egg with soft avocado, tomato, and a little sauce. Warm, moist fillings make even firm eggs taste pleasant again. A warm sandwich with melted cheese and soft bread also hides a tough egg very well.
Serve Tender Eggs

Serve fried eggs right away on a warm plate. A cold plate firms the whites fast, so warm the plate with hot water first. Serve fried eggs right away on a warm plate, while the yolk still shines. A cold plate firms the whites fast.
- Warm the serving plate for a minute.
- Slide the egg gently onto the plate.
- Add salt and pepper at the table, not in the pan.
- Scatter fresh herbs over the top if you like.
- Serve with toast while the yolk is still soft.
Final Tender Check

Quick Tip: Cut one bite and check the texture. The white should feel tender and the yolk should flow or feel softly set. If the white still feels firm, lower the heat further on the next egg.
This quick check teaches you faster than any timer. Each stove runs a little differently, and one test egg tells you exactly where your low setting should sit. Watch the whites, not the clock, since every pan heats a little differently. Clear whites turning opaque is the sign to pull the pan.
Conclusion
Fixing rubbery fried eggs comes down to low heat, fresh eggs, and pulling them off the pan a little early. Those three habits give you tender whites and soft, glossy yolks every morning. Try them tomorrow and enjoy eggs that feel as good as they taste. Keep the heat gentle and the timing short every morning, and tender eggs will become your normal result. A calm pan and a watchful eye beat any fancy technique, and breakfast will feel easy again. For another kitchen rescue, read the curry gravy fixes for a smooth rich gravy next.