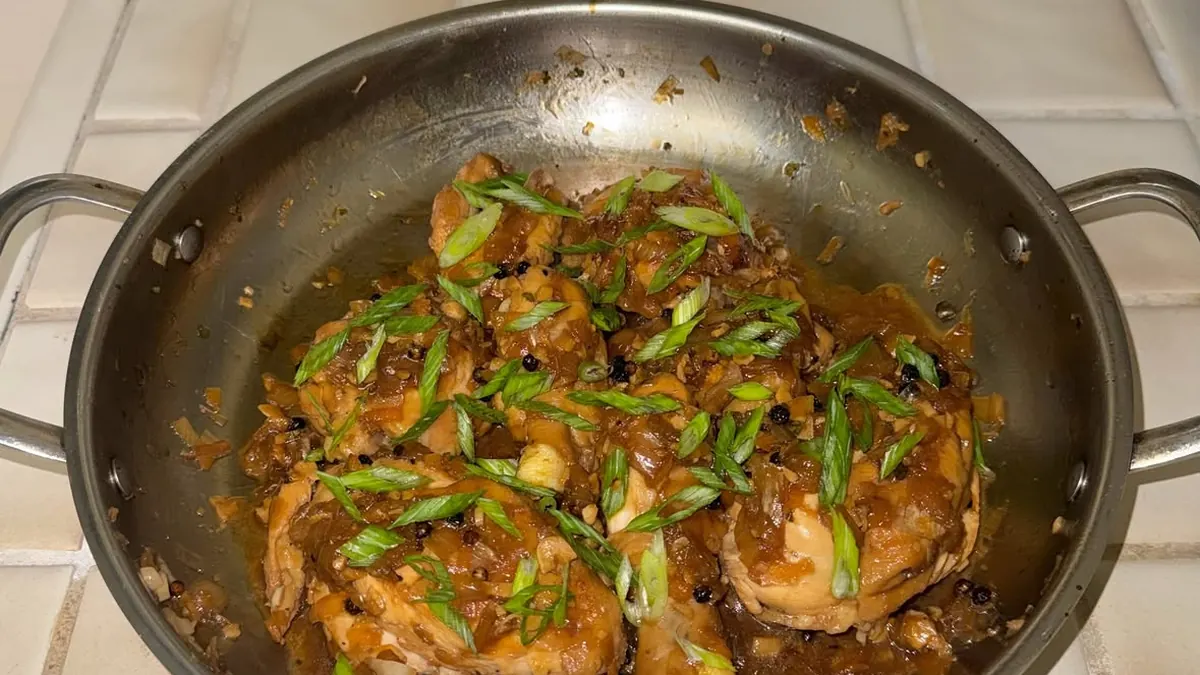
20 Chicken Adobo Ideas That Scream Glistening Comfort
Some dinners announce themselves before the lid even lifts, and chicken adobo is one of them: garlic, vinegar, and soy sauce simmering into something dark, glossy, and completely irresistible. That sharp, savory steam has pulled my family into the kitchen on the gloomiest weeknights of the year.
This collection gathers twenty versions worth knowing, from the classic vinegar braise and a coconut milk twist to crispy fried finishes, slow cooker batches, and a sweet pineapple pan for anyone who likes a rounder sauce.
Every version keeps the same promise: tender chicken, a sauce worth spooning over rice, and leftovers that taste even better tomorrow. Pick the pot that fits your evening, save the rest for later, and let the stove do the fragrant work for you tonight.
Classic Vinegar Braise
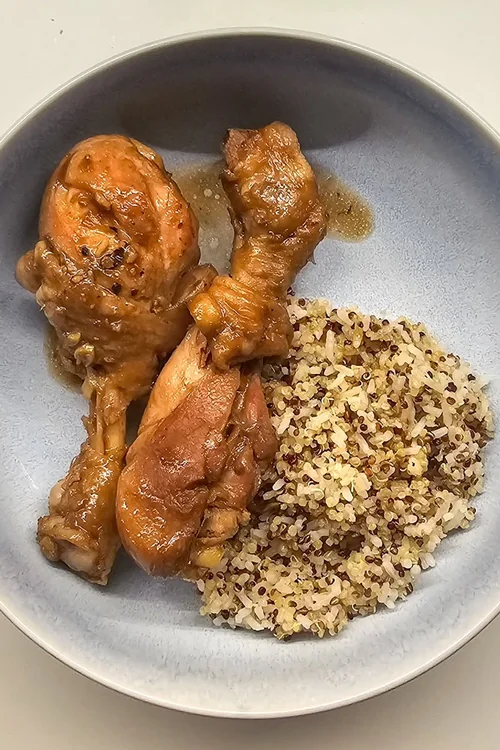
Image Credit: @platedbyles
The classic pot starts with chicken pieces simmered straight in vinegar, soy sauce, garlic, bay leaves, and black peppercorns, no browning required before the lid goes on. The vinegar cooks off its sharpest edge during the first quiet simmer, leaving behind that signature tang everybody recognizes instantly.
Give the chicken twenty undisturbed minutes before you stir, because early stirring tears the skin and clouds the sauce. After that, the lid comes off and the liquid reduces into a dark, glossy coat that clings to every piece and begs for a mound of plain steamed rice. My lamb kebabs bring that same feast night spirit.
Glistening Rice Plate
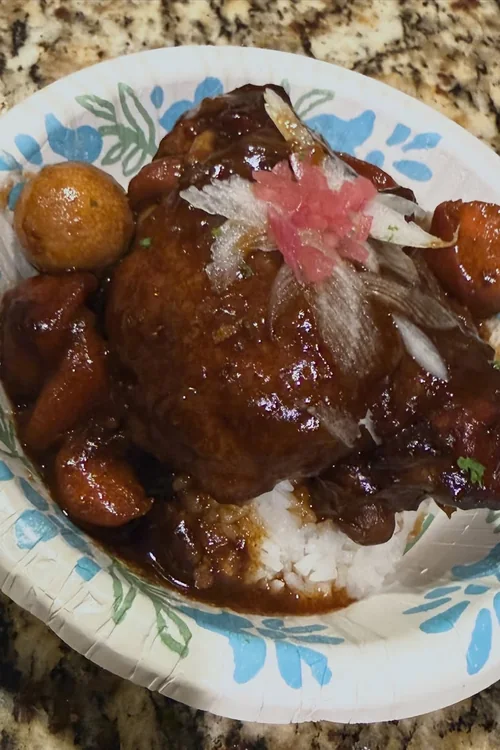
Image Credit: @phi_gomez
- Spoon the chicken over rice that is still steaming, so the grains catch the sauce the moment it lands.
- Reduce the sauce a little further than feels safe, because rice dilutes the first glossy spoonfuls fast.
- Rest the chicken five minutes off the heat, letting the skin drink the sauce back in.
- Scatter sliced scallions or fried garlic over the plate for a fresh, sharp contrast.
- Serve extra sauce in a small bowl at the table, never drowned over the whole platter.
A rice plate lives or dies on contrast: soft grains, sticky sauce, tender chicken, and one bright garnish on top. I have noticed that a single spoonful of the reduced sauce, drizzled at the very end, makes the whole plate look like it came from a small Manila eatery.
Double Garlic Punch

Image Credit: @adoborableph
Quick Tip: Use two forms of garlic for real depth: crushed cloves simmered in the braise, plus a spoonful of golden fried garlic stirred in at the end. The simmered cloves turn sweet and mellow, while the fried bits stay punchy. Together they make the sauce taste layered.
Garlic shy versions of this braise always taste like something is missing, and this double approach fixes that without burning a single clove. Keep the fried garlic separate until serving, because ten minutes in hot sauce softens the crunch that makes the whole trick worth doing.
Dull To Glossy

Image Credit: @chewyma
Before: A rushed pot comes off the stove looking pale and a little sad: the sauce stays thin and watery, the chicken tastes flat, and the vinegar still bites at the back of the throat. Dinner is fine, technically, yet nobody reaches for a second piece or asks for more rice.
After: Fifteen uncovered minutes at a steady simmer change everything: the sauce tightens into a dark, shiny glaze, the edges of the chicken caramelize, and the tang rounds into something deep and savory. Seconds disappear, rice bowls empty, and the cook gets asked for the recipe before dessert.
Reduction is the whole secret here, and patience is the only ingredient it costs. Watch the bubbles rather than the clock, because the sauce thickens fastest in the final minutes and can slide from glossy to scorched while you are busy setting the table for dinner.
Weeknight Stovetop Steps

Image Credit: @unapologetically_bri_7
- Pat the chicken dry and season it lightly, because surface moisture fights the sear you want later.
- Combine vinegar, soy sauce, water, garlic, bay leaves, and peppercorns in the pot and bring everything to a boil.
- Add the chicken skin side down, lower the heat, and simmer twenty minutes without lifting the lid.
- Turn the pieces once, then simmer uncovered fifteen minutes more while the sauce reduces and darkens.
- Rest the pot five minutes off the heat, skim any loose fat, and spoon the sauce over to serve.
A written order sounds fussy, yet it turns a weeknight braise into something you can cook while homework happens at the counter. In my experience the whole pot takes forty relaxed minutes, and most of that time the stove is working while you are not.
Cane Versus White Vinegar

Image Credit: @samanigobaby
| Point | Cane Vinegar | White Vinegar |
|---|---|---|
| Flavor | Soft, slightly sweet, with a rounded warmth | Sharp and clean, with a brighter bite |
| Tang | Gentle acidity that melts into the sauce | Bold acidity that stays front and center |
| Sauce color | Deepens the braise toward amber brown | Keeps the sauce lighter in color |
| Best moment | Classic pots and sweeter regional styles | Lean, punchy versions for vinegar lovers |
Neither vinegar is wrong, and the honest answer depends on the table you are feeding that night. Cane vinegar forgives beginners and pleases crowds, while white vinegar rewards cooks who like their braise assertive, bright, and unapologetically sharp from the first bite to the last spoonful.
Marinade Ground Rules

Image Credit: @wit.gem
DO: Marinate the chicken in soy sauce, garlic, and pepper for at least thirty minutes so the seasoning reaches past the skin. Keep the vinegar out of the marinade and add it in the pot instead. Pat the pieces dry before simmering for a cleaner, darker sauce.
DON’T: Never marinate overnight in vinegar, because the acid turns the surface of the chicken chalky and tough. Do not boil the used marinade and pour it back without simmering it first. Skip metal bowls for long marinades, since reactive pans can leave a tinny edge.
A short, soy based marinade is the quiet head start behind most great pots of this braise. It seasons the meat itself instead of only the sauce, so even a plain bite of chicken, eaten without any glaze at all, tastes deliberate rather than bland.
Pantry Friendly Facts

Image Credit: @cookinginafoodmarket
Cost: Low, one chicken and three pantry staples carry the pot.
Time Needed: About forty minutes, mostly hands off simmering.
Difficulty: Easy, one pot and no special knife work at all.
Best For: Weeknight dinners and first time Filipino cooking.
Few braises reward an almost empty fridge this generously, which is why this pot survives every grocery price spike in my house. Soy sauce, vinegar, and garlic keep for months, so the only real shopping is the chicken itself and maybe a bag of rice.
Coconut Milk Twist

Image Credit: @kuyabigmak
A can of coconut milk stirred into the braise during the final simmer changes the whole personality of the pot. The sauce turns pale, silky, and gently sweet, cushioning the vinegar tang until it hums in the background instead of leading every single bite at the table.
Add the coconut milk late and keep the heat gentle, because a hard boil can split it into an oily slick. I have noticed the pieces taste richest when they rest ten minutes in the warm sauce, drinking up that creamy, garlicky bath before the rice arrives.
Slow Cooker Sunday

Image Credit: @snugxan
- Load the chicken, soy sauce, garlic, bay leaves, and peppercorns into the crock before Sunday errands begin.
- Hold the vinegar back until the final hour, so its brightness survives the long, slow cooking.
- Cook on low for five hours, until the meat nearly slides from the bone when nudged.
- Pour the liquid into a saucepan and reduce it by a third for a proper glossy finish.
- Return the chicken to the thickened sauce for ten warm minutes before the bowls go out.
The slow cooker version trades a little stovetop drama for a house that smells incredible by noon. Reducing the cooking liquid at the end is not optional decoration; it is the step that turns a good crock of chicken into something your family requests by name.
Crispy Fried Finish
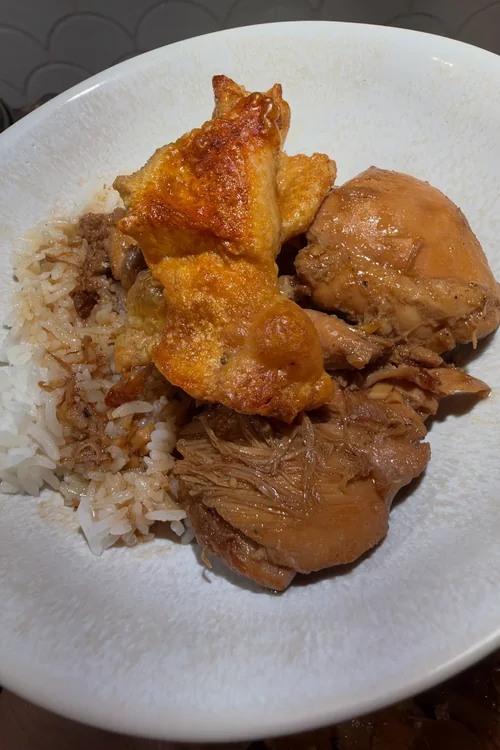
Image Credit: @petehellaeats
Quick Tip: Braise the chicken until tender, then lift it out and fry the skin side in hot oil for two minutes before serving. The sauce goes back over the crackling pieces at the table. That one contrast, crisp skin against soft meat, changes everything.
This finish borrows the best trick from lechon manok stalls: texture. Keep the fried pieces out of the sauce until the plates are ready, because even five minutes of steaming under a lid softens the crackle you worked for, and nobody mourns a lost crunch quietly.
Too Sour To Balanced

Image Credit: @januarymaebendicio
Before: An over vinegared pot makes everyone at the table wince: the sauce tastes thin and aggressively sharp, the chicken seems almost pickled, and even a mountain of rice cannot soften the blow. Most cooks panic here and reach for sugar by the spoonful, which only muddies things further.
After: Ten more uncovered minutes let the harshest acid cook away, and a small splash of water plus a pinch of sugar restores the balance. The sauce turns round and glossy again, the tang sits politely behind the garlic, and the table goes quiet in the good way.
Almost every sour pot is fixable, because vinegar mellows with heat and time more than cooks expect. Taste after the reduction, never before, since a sauce judged too early gets overcorrected and lands somewhere sweet, flat, and oddly sad by the time it reaches the rice.
Make Ahead Method

Image Credit: @whatscookingchefca
- Braise the full pot a day early and cool it in its own sauce, which deepens the flavor overnight.
- Refrigerate the chicken submerged, because pieces left above the liquid dry out and darken at the edges.
- Lift the solid fat from the cold surface in the morning for a cleaner, brighter sauce.
- Reheat gently over low heat, turning the pieces once so they warm through without breaking apart.
- Reduce the sauce a final five minutes if it loosened in the fridge, then serve over fresh rice.
Make ahead is not a compromise with this braise; it is an upgrade hiding in plain sight. The garlic mellows, the soy deepens, and the chicken seasons all the way to the bone, so tomorrow’s dinner quietly tastes like the version you meant to serve today.
Bone In Versus Boneless
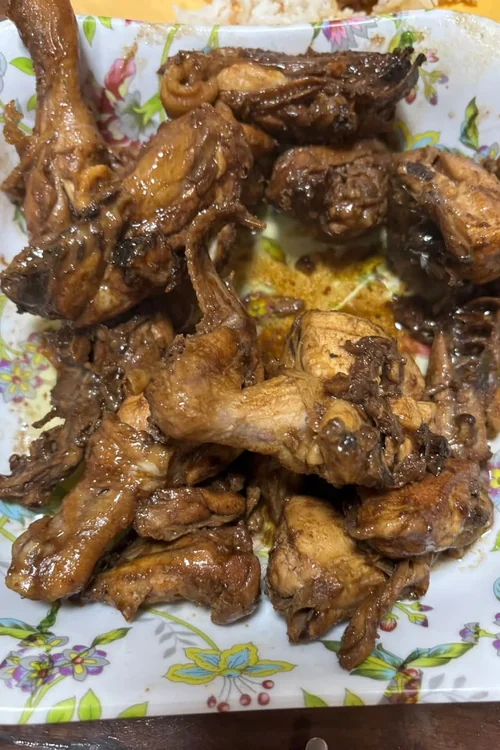
Image Credit: @cherrylponce
Bone In: Thighs and drumsticks on the bone bring the deepest flavor to the pot, because the bones enrich the sauce while protecting the meat from drying out. They need a few extra minutes of simmering, reward patience with silky texture, and look properly rustic piled on a platter.
Boneless: Skinless boneless thighs cook faster, slice neatly for meal prep bowls, and soak up sauce in every bite. The trade off is real, though: without bones and skin the braise tastes a touch lighter, so season a little bolder and reduce the sauce slightly further for balance.
My own pot splits the difference most weeks: bone in thighs for the table, plus a few boneless pieces reserved for tomorrow’s packed lunches. Both cuts drink the same sauce happily, and nobody at dinner has ever complained about having two kinds of chicken to choose from.
Leftover Night Rules

Image Credit: @ornelasivette
- DO: Store the chicken covered in its sauce, so every piece stays moist until the second serving.
- DO: Reheat slowly on the stove with a splash of water, loosening the sauce back to glossy.
- DO: Shred leftover meat into fried rice the next day for a completely different second dinner.
- DO: Spoon the remaining sauce over plain rice or eggs, because it is far too good to waste.
- DON’T: Microwave the chicken at full power, which tightens the meat and splits the sauce.
- DON’T: Leave the pot sitting out on the counter for hours after dinner ends.
- DON’T: Freeze the chicken in a thin layer of sauce, since exposed pieces dry and darken.
- DON’T: Reheat the same batch more than once, because texture and flavor fade quickly.
Leftovers are where this braise proves its worth, since the flavors settle and deepen overnight in a way fresh pots cannot match. Treat the second serving gently and it honestly outshines the first, which is a rare thing to say about any chicken dinner at all.
Freezer Friendly Facts
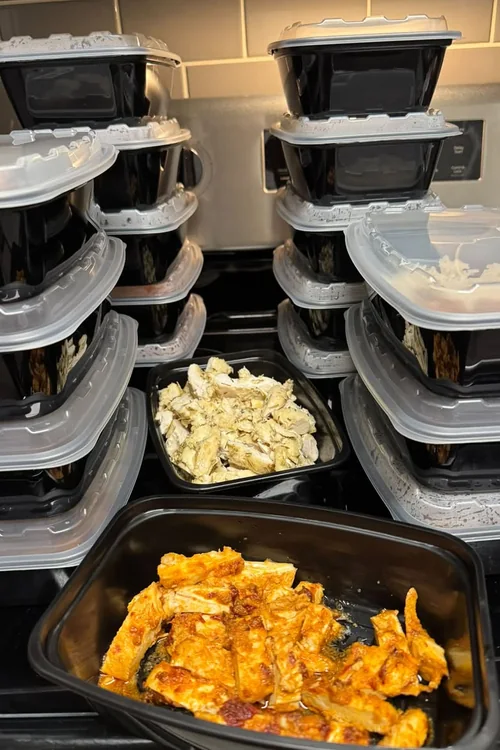
Image Credit: @alicianowry
Cost: Low, one batch fills four freezer containers for later.
Time Needed: Fifteen minutes of reheating from thawed, start to finish.
Result: Sauce and texture survive freezing almost perfectly intact.
Works In: Busy weeks, new baby meals, and storm day planning.
A freezer stash of this braise has rescued more chaotic evenings at my house than any delivery app ever has. Freeze it in its sauce, thaw it in the fridge overnight, and dinner the next day tastes like somebody planned the whole week beautifully in advance.
Sweet Pineapple Version
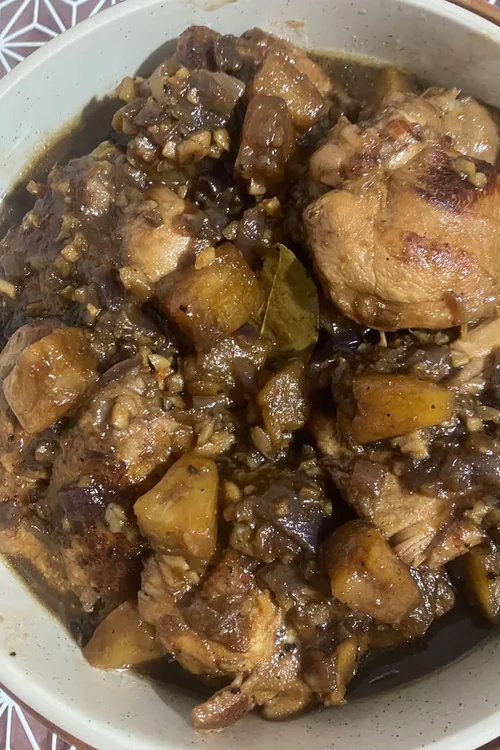
Image Credit: @callejabeth
Pineapple juice swapped in for part of the vinegar, with a handful of chunks added near the end, turns this braise in a sweeter, sunnier direction. The sauce glazes the chicken with a gentle fruitiness that wins over kids and anyone who finds the classic version too sharp.
Keep some vinegar in the pot even here, because pure juice turns the sauce flat and candy like by the second helping. A three to one balance keeps the tang alive under the sweetness, and the warm pineapple chunks become little prizes tucked between the chicken pieces.
Spicy Chili Heat

Image Credit: @shelpa_laturnas
- Add two whole red chilies to the simmer for background warmth that builds slowly and kindly.
- Stir a spoonful of chili garlic sauce into the reduction when you want the heat up front.
- Keep the seeds in for a fiercer pot, or split and scrape them for gentle, steady fire.
- Balance aggressive heat with a pinch of sugar and an extra splash of soy sauce.
- Warn the table before serving, because the dark sauce hides its fire extremely well.
Heat suits this braise beautifully, because the vinegar and soy give the chilies something deep and savory to push against. Start modestly, taste the reduced sauce, and remember that a fresh chili scattered over the finished plate adds brightness no simmered pepper can quite deliver.
Potato Egg Pot
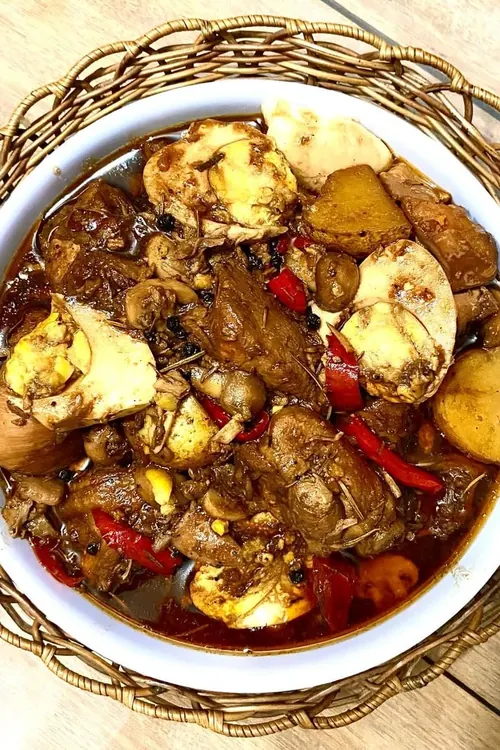
Image Credit: @tootscoronadojr
Quick Tip: Add halved potatoes and peeled hard boiled eggs during the final fifteen minutes of simmering. The potatoes drink the dark sauce to their centers, and the eggs turn glossy amber with savory yolks. Both stretch one pot of chicken across a bigger table easily.
This is the version I cook when the headcount grows at the last minute, because potatoes and eggs make the pot feel endless. The eggs especially win people over: humble, golden, and soaked through with sauce, they sometimes disappear before the chicken even leaves the stove.
Dry Style Finish

Image Credit: @palomaantonioebarsabal
Before: A standard pot finishes with plenty of sauce, which is wonderful over rice but can taste a little one note by the third serving. The pieces sit in liquid the whole meal, the skin stays soft, and the flavors never quite concentrate into that deep, sticky intensity.
After: Keep reducing past glossy, until the sauce all but disappears and the rendered fat starts sizzling around the pieces. The chicken turns deep mahogany, the edges crisp in their own oil, and every bite lands concentrated, salty, and rich enough to demand rice by the forkful.
Dry style is the cook’s reward version, intense and a little rustic, best eaten with your hands and plenty of rice. Watch it closely at the end, because the line between caramelized and burnt is measured in seconds once the liquid is truly gone for good.
Conclusion
Twenty pots later, the lesson stays simple: chicken adobo needs patient simmering, a sauce reduced until it shines, and enough garlic to make the whole kitchen smell like somebody’s grandmother is cooking.
Start with the classic braise, keep a freezer batch ready for the hard weeks, and try the crispy finish when company comes. Pin this collection, share it with a fellow comfort food lover, and tell me which pot your family scraped clean first.
In my experience, quiet evenings end with this braise on the table and nobody asking what else there is. My smothered pork chops offer the same rich, cozy comfort.