Why Are My Chicken Wings Not Crispy In The Oven? Easy Fix Guide
If your crispy oven chicken wings come out soft, you are not alone. Wet skin steams in the oven, and a flat tray traps moisture underneath. The good news is that drying, a rack, and high heat fix it.
This guide covers drying, seasoning, rack baking, and saucing. You will learn why wings stay limp and how to get a real crunch from the oven. Every fix uses basic tools and pantry staples.
Once your wings turn crisp, the next steamed dish may need the same care, so keep the chewy dumplings guide handy for tender, delicate dumplings every time.
Why Wings Stay Soft

Most soft wings suffer from wet skin and trapped steam. Moisture on the surface must evaporate before the skin can crisp, and a flat tray holds liquid against the wings. The result is steamed, rubbery skin that never browns. Even a hot oven cannot rescue wings that sit in liquid.
Low heat makes it worse, since the fat renders slowly and soaks the skin. In my experience, the fix is drying the wings well, lifting them on a rack, and baking hot. Dry skin plus air flow plus high heat gives a real crunch every time.
Dry Wings Before Baking

Drying the wings is the most important step. Surface water is the enemy of crisp skin, so take time to pat each wing dry before seasoning. A dry surface lets salt and baking powder cling evenly. Follow these steps for dry, ready wings.
- Pat every wing dry with paper towels, twice if needed.
- Toss with salt and one teaspoon of baking powder per pound.
- Arrange on a rack and refrigerate uncovered for one hour.
- Bake straight from the fridge on the rack.
Use a Rack Always

Quick Tip: A wire rack lifts the wings out of the drippings. Hot air reaches all sides, so the bottoms crisp instead of steaming. Choose a rack that fits inside your baking tray with room to spare.
A rack is the cheapest upgrade for oven wings. Without one, the underside sits in rendered fat and stays soft. With one, every side crisps evenly. Leave space between the wings so air flows freely, and line the tray below with foil for easy cleanup.
Fix Soggy Wings

Common Mistake: Many cooks sauce the wings before baking. Wet sauce steams the skin and stops it from crisping. The wings then bake soft no matter how hot the oven runs.
The Fix: Bake plain, sauce last. Crisp the wings fully, then toss them in warm sauce right before serving. A light coat at the end keeps the skin crunchy and the flavor fresh.
Rescue is simple if the wings are already baked soft. Return them to a hot oven on a rack for 10 minutes, and let the skin dry out. Then sauce lightly and serve at once. The second bake restores much of the crunch, so the batch is still worth serving.
Season for Crisp Skin

What You Need:
- Baking powder: raises the pH so the skin browns and crisps faster.
- Salt: draws out moisture and seasons the skin.
- Garlic powder: adds savory flavor without burning.
- Paprika: gives color and gentle warmth.
- A wire rack: lifts wings for even air flow.
Baking powder is the secret ingredient for oven wings. It helps the skin dry and brown, and one teaspoon per pound is enough. Use aluminum free baking powder to avoid any odd taste. Toss the wings well so every piece is coated, and let them rest before baking.
Before Soft After Crisp

Before: The wings look pale and limp. The skin is soft and wet, and each bite feels steamy. The tray holds liquid, and the wings never get a chance to brown.
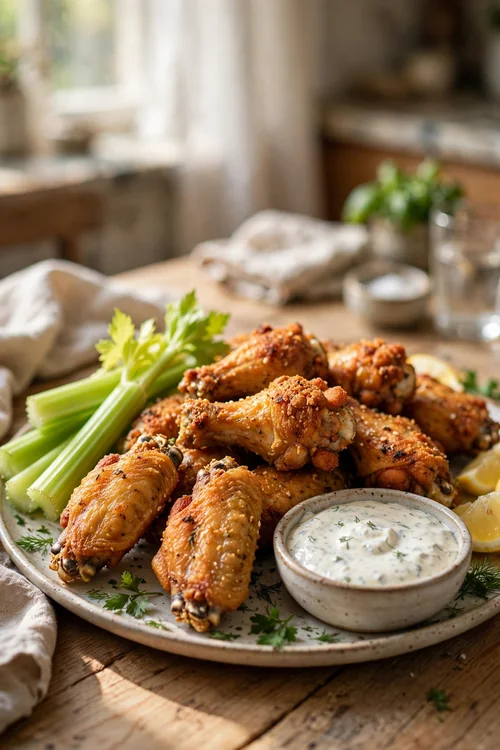
After: The wings are golden and crunchy. The skin crackles, and each bite stays crisp. The tray stays dry, and the wings hold their crunch to the last bite.
The change comes from drying, a rack, and high heat, not from frying. Pat dry, season with baking powder, and bake on a rack at high heat. Those habits turn soft oven wings into wings that crunch like fried ones, with far less mess and fuss.
Do and Don’t Basics
Do This:
- Pat wings very dry before seasoning.
- Use a wire rack over a lined tray.
- Bake at 425 degrees until deeply golden.
- Sauce after baking, not before.
Avoid This:
- Do not bake wings on a flat tray.
- Do not crowd the wings together.
- Do not sauce before the skin crisps.
- Do not open the oven every few minutes.
These habits give oven wings a real crunch. Dry skin, air flow, and hot steady heat are the whole secret. Once the routine is set, crisp wings become the normal result. Stick to the list, and every batch will turn out golden, crunchy, and ready fast.
Quick Wing Facts

Time Needed: 45 minutes plus 1 hour drying.
Difficulty: Easy, with mostly hands off time.
Best For: Game day, parties, and weeknight dinners.
Pro Tip: Flip once halfway for even browning.
Flipping gives both sides equal time in the hot air. Turn each wing once at the halfway mark, and the skin will crisp evenly. Skip the flip and the underside may stay soft, even on a rack. One quick turn is all it takes for wings that crunch on both sides.
Rest for Extra Crunch

Resting lets the skin set and the crunch firm up. Wings straight from the oven are still steaming, and that steam softens the skin. A five minute rest on the rack lets the moisture escape. The skin firms as it cools slightly, and the crunch holds longer.
Do not cover the wings while they rest, since trapped steam will undo the crispness. Leave them open on the rack, then toss in sauce at the last second. The wings will stay crunchy through the first serving and beyond, so serve them as soon as they are sauced.
Rescue a Limp Batch

A limp batch can still be saved with a hot second bake. Dry the skin, blast it with heat, and sauce only after the crunch returns. The rescue takes about twelve minutes, and it works on wings that went soft in the oven or on the counter.
- Place the wings on a rack over a lined tray.
- Blot any surface moisture with paper towels.
- Bake at 450 degrees for 10 minutes.
- Broil for 2 minutes, watching closely.
- Toss in warm sauce and serve at once.
Sauce Without Sogginess

Quick Tip: Warm the sauce and use half as much as you think. A light coat adds flavor without drowning the crisp skin. Toss fast, then serve at once while the skin is still crunchy.
Sauce is where many crisp wings go soft. A heavy, cold sauce cools the skin and soaks it. Warm the sauce first, toss the wings quickly, and serve at once. The wings will taste saucy and stay crunchy at the same time, which is the whole point.
Conclusion
Getting crispy oven chicken wings comes down to dry skin, a rack, and high heat. Those three habits give golden, crunchy wings without frying. Once they are routine, crisp wings take no extra effort.
Work through these fixes one at a time, and your next batch will show the difference. Keep notes on what worked, so the fix gets easier every time you cook.
Bake plain, sauce last, and serve fast. For another dish where texture is everything, see the fried rice guide, then enjoy your wings while they still crunch.