Why Does My Pizza Dough Keep Shrinking Back? Easy Fix Guide
If your shrinking pizza dough springs back every time, you are not alone. Tight gluten, cold dough, and rushed stretching all make it fight you. The good news is that rest and gentle hands fix it.
This guide covers resting, warming, stretching, and topping. You will learn why the dough shrinks and how to stretch it wide and thin. Every fix uses basic tools and pantry staples. The fix works really fast.
Once your dough stretches easily, the next kitchen worry may need the same care, so keep the pink chicken guide handy for safely cooked chicken every single time.
Why Pizza Dough Shrinks
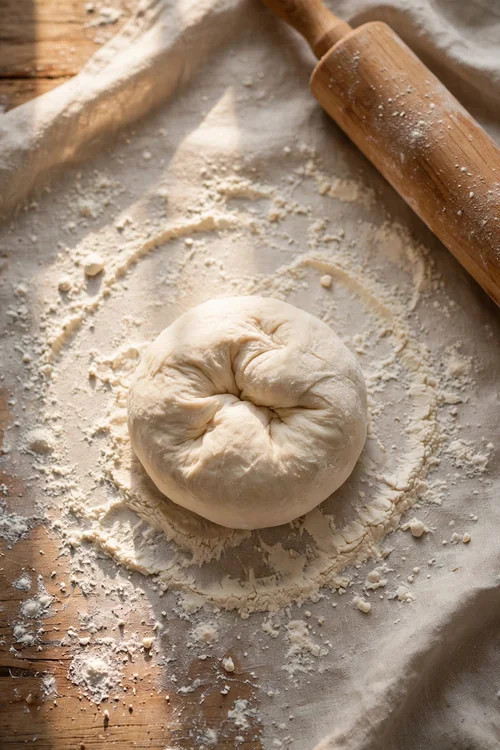
Most springy dough has tight gluten that has not relaxed yet. Freshly kneaded dough is springy, and cold dough is even tighter. Stretch it now, and it will pull back like a rubber band. The gluten needs time to relax before it will hold a new shape, and rest gives it that time. Rest it well first.
Overworking the dough makes it worse, since each stretch tightens the gluten further. The fix is rest and warmth, with patience at every step. A relaxed, room temperature dough stretches easily and stays stretched, and it will hold a thin, even base.
Rest Dough Before Stretching

Resting relaxes the gluten so the dough stops fighting you, and it is the simplest fix. A dough that rests for 20 minutes stretches twice as far as one stretched cold. Rest the balls after dividing, and rest again after the first stretch. Follow these steps for dough that cooperates.
- Divide the dough into balls after kneading.
- Cover and rest the balls for 20 minutes.
- Stretch gently, then rest 10 minutes more if it pulls back.
- Stretch again and top at once.
Stretch From the Center

Quick Tip: Press from the center outward and leave the edge alone. The middle thins evenly, and the edge stays puffy for a good crust.
Center out stretching keeps the dough even, so work from the middle. Rolling from the edge crushes the air and pushes the dough back toward the middle. Press gently with your fingertips, turn the dough often, and let gravity help by draping it over your knuckles. The dough will stretch wide without tearing.
Fix Dough That Springs Back

Common Mistake: Many cooks fight springy dough by stretching harder. Force only tightens the gluten further, and the dough springs back more.
The Fix: Walk away. Ten minutes of rest relaxes the dough more than any amount of pulling.
Resting is the only real fix for tight dough, so walk away from it. Set the dough down, cover it, and do another task for 10 minutes. When you return, the dough will stretch with little resistance. Two short rests beat one long fight every time, and the base will stay stretched.
Choose the Right Flour

What You Need:
- Bread flour or 00 flour: gives a chewy, stretchy crust.
- A kitchen scale: measures flour and water exactly.
- A bench scraper: moves the dough without tearing it.
- A pizza stone or steel: bakes the crust crisp.
- A peel or tray: carries the pizza to the oven.
Flour choice affects how the dough stretches. Bread flour gives a chewy crust with good stretch, while 00 flour gives a soft, Neapolitan style crust. All purpose flour works too, but the crust will be less chewy. Whatever you use, measure the water carefully, since wet dough stretches more easily.
Before Shrunken After Wide
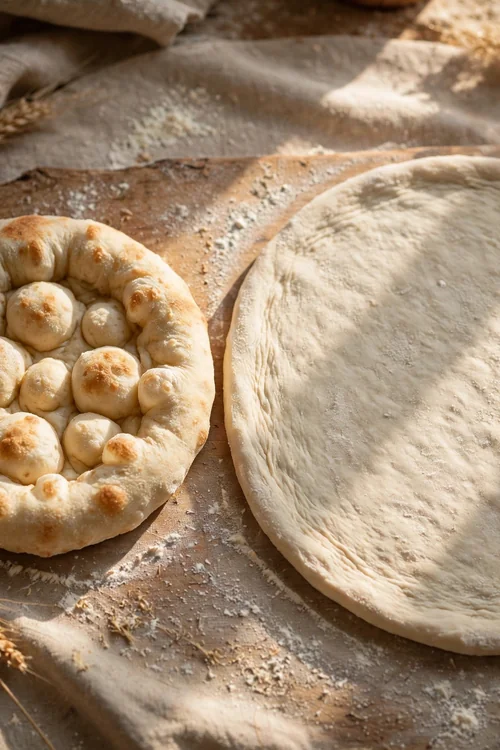
Before: The dough springs back into a thick disc. The crust is dense, and the toppings sit in a small circle.
After: The dough stretches wide and thin. The edge puffs up, and the toppings spread evenly.
The change comes from rest, warmth, and gentle stretching, not from a new recipe. Rest the dough, warm it up, and stretch from the center outward. Those habits turn a stubborn dough into a wide, thin base, and the difference shows at the first stretch. Keep the routine steady, and easy stretching follows every time.
Do and Don’t Basics

Do This:
- Rest the dough before stretching.
- Stretch from the center outward.
- Use warm, room temperature dough.
- Top quickly and bake at once.
Avoid This:
- Do not stretch cold dough.
- Do not fight springy dough.
- Do not use a rolling pin hard.
- Do not let stretched dough sit long.
These habits give a wide, thin base every time, and they work for any dough. Rest, warmth, and gentle hands are the whole secret, and none of them needs special equipment. Once the routine is set, easy stretching becomes the normal result at your table. Repeat the routine, and wide bases follow every time.
Quick Pizza Facts

Time Needed: 15 minutes stretching plus 1 hour rising.
Difficulty: Easy, with a little practice.
Best For: Friday nights, parties, and family dinners.
Pro Tip: A hot oven makes a crisp crust.
Heat the oven as hot as it goes, and preheat the stone or steel for 45 minutes. A hot surface crisps the bottom fast, so the crust stays thin and crunchy. A cool oven leaves the base pale and soft, and the toppings turn soggy. Preheat, and the crust will puff and crisp in minutes.
Warm Dough Gently

Warming the dough gently makes it stretch far more easily, and it takes only half an hour. Cold dough from the fridge is tight and springy, while room temperature dough is relaxed and soft. Let the dough sit out for 30 minutes before stretching, and it will cooperate. The wait is the easiest part of the whole process.
Do not rush the warming with heat. A warm oven or hot water will kill the yeast and dry the surface. Room temperature air is enough, and the dough will tell you when it is ready by feeling soft and relaxed.
Rescue a Tight Dough

A tight dough can still be saved with rest and gravity, so do not force it. Let it relax, drape it over your knuckles, and let its own weight do the stretching. Gravity stretches slowly and evenly. Follow these steps to rescue a tight dough and bake it thin.
- Set the dough down and cover it.
- Rest for 10 minutes.
- Drape the dough over your knuckles.
- Let gravity stretch it slowly.
- Lay it on the peel and top at once.
Top and Bake

Quick Tip: Top lightly. A heavy load of sauce and cheese weighs the base down and makes it soggy.
Light topping keeps the crust crisp. A thin layer of sauce, a modest handful of cheese, and a few toppings are enough. Bake at once on the hot stone, and the crust will puff and crisp. The same pizza will taste far better topped lightly than buried under sauce, so keep it light.
Conclusion
Fixing shrinking pizza dough comes down to rest, warmth, and gentle stretching. Those three habits give wide, thin crusts. Once they are routine, easy stretching takes no extra effort.
Work through these fixes one at a time, and your next batch will show the difference. Keep notes on what worked, so the fix gets easier every time you cook.
Rest the dough, stretch from the center, and top lightly. For another kitchen worry that needs care, see the bread dough guide, then bake your pizza while the base is still thin.