How To Fix Sticky Bread Dough That Won’t Knead? Easy Fix Guide
If your sticky bread dough glues itself to everything, you are not alone. Too much water at once, dry hands, and rushed kneading all make it cling. The good news is that gradual water and patience fix it.
This guide covers hydration, kneading, resting, and shaping. You will learn why the dough turns sticky and how to make it smooth. Every fix uses basic tools and pantry staples. It works.
Once your dough turns workable, the next dough may need the same care, so keep the pizza dough fixes handy for dough that stretches smoothly and stays put without springing back.
Why Bread Dough Sticks

Most sticky dough comes from too much water added too fast. Flour needs time to absorb water, and a wet dough that is rushed never firms up. Once the dough is soupy, extra kneading only spreads it around. Hold back some water at the start, and the dough will come together.
Dry hands make it worse, since wet dough grabs any dry surface and clings to fingers. The fix is gradual water, wet hands, and rest. A dough that rests absorbs water and firms up on its own, and the loaf bakes lighter with a better crust.
Hydrate Dough Gradually
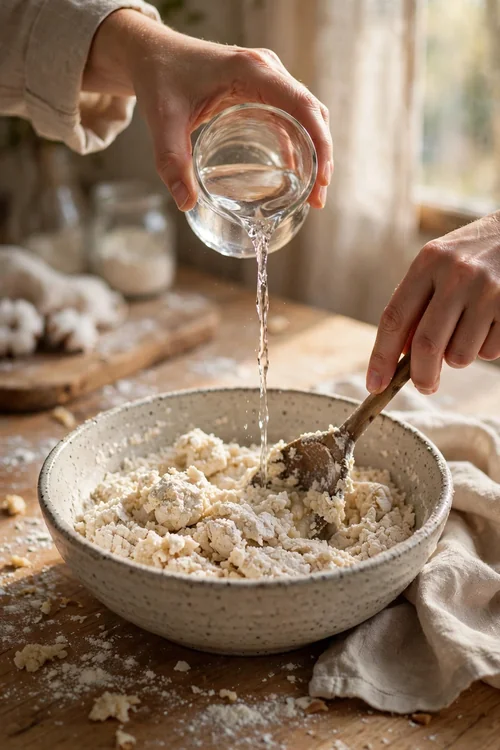
Adding water slowly lets the flour absorb it evenly. A dough mixed all at once stays wet and sticky, while a gradual mix firms up as you go. Hold back part of the water, rest the dough, and add more if needed. Follow these steps for dough that comes together.
- Hold back 10 percent of the water in the recipe.
- Mix the rest in slowly until a shaggy dough forms.
- Rest 20 minutes, then add the remaining water if needed.
- Knead gently until the dough turns smooth.
Use Wet Hands

Quick Tip: Wet your hands before touching the dough. Wet dough cannot stick to wet hands, and you will not need extra flour.
Wet hands are the simplest fix for sticky dough. Flour on your hands dries the dough and changes the recipe, while water keeps the dough clean and workable. Dip your hands before each fold, and the dough will release easily. A bench scraper helps move the dough without touching it.
Fix a Sticky Dough

Common Mistake: Many bakers pour in flour to fix sticky dough. Extra flour dries the loaf and makes a dense, heavy bread.
The Fix: Rest the dough instead. Twenty minutes of rest lets the flour absorb water, and the dough firms up on its own.
Resting beats flour every time, so trust the rest. Cover the bowl and walk away for 20 minutes, then try the dough again. It will feel smoother and less sticky. If it still clings, rest it for 20 more minutes before adding even a spoon of flour. The flour needs time to absorb the water.
Knead With Patience

What You Need:
- Bread flour: absorbs more water and builds a strong dough.
- A bench scraper: moves sticky dough without adding flour.
- A large bowl: gives the dough room to rise.
- A kitchen scale: measures flour and water exactly.
- A damp cloth: covers the dough while it rests.
Patient kneading builds strength without drying the dough, so alternate kneading with rest. Knead for 5 minutes, rest for 10, and knead again. The rests let the flour hydrate, and the dough will feel smoother after each one. A strong, smooth dough holds its shape and bakes into a light loaf.
Before Sticky After Smooth
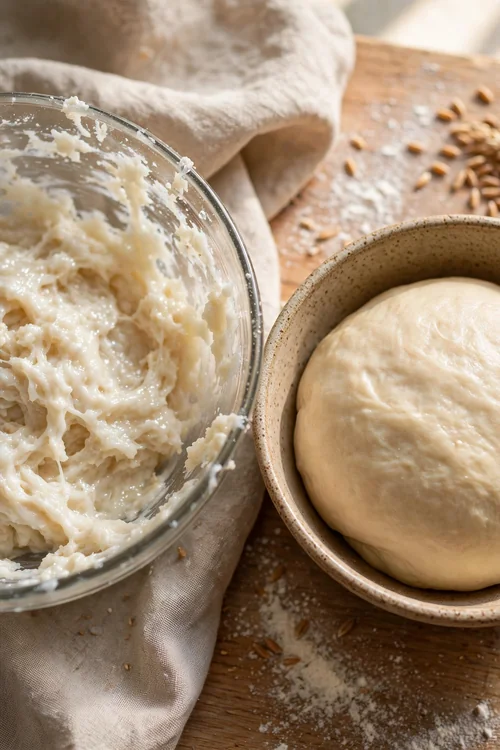
Before: The dough clings to everything. It spreads flat, tears when stretched, and will not hold a shape.
After: The dough is smooth and elastic. It pulls cleanly from the bowl and holds a round shape.
The change comes from gradual water, wet hands, and rest, not from extra flour. Add water slowly, handle with wet hands, and rest often between kneads. Those habits turn a sticky mess into a dough that works, and the difference shows at the first fold. Keep the routine steady, and smooth dough follows every time.
Do and Don’t Basics

Do This:
- Add water gradually.
- Use wet hands and a scraper.
- Rest the dough between kneads.
- Weigh flour and water exactly.
Avoid This:
- Do not dump in all the water at once.
- Do not add handfuls of flour.
- Do not knead a dry dough hard.
- Do not rush the resting time.
These habits keep dough smooth from bowl to oven, and they work for every batch. Gradual water, wet hands, and rest are the whole secret, and none of them needs special equipment. Once the routine is set, workable dough becomes the normal result at your table. Repeat the routine, and smooth dough follows every time.
Quick Bread Facts

Time Needed: 20 minutes mixing plus 2 hours rising.
Difficulty: Medium, with mostly hands off time.
Best For: Sandwich loaves, boules, and rolls.
Pro Tip: A warm spot speeds the rise.
Dough rises best in a warm, draft free spot around 78 degrees, so find a corner. A cold kitchen slows the rise and leaves the dough sticky longer. Set the bowl in a warm oven with the light on, and the dough will firm up and rise steadily. Warmth helps the flour finish absorbing water.
Let Dough Rest

Resting is the most underrated step in bread baking, and it costs nothing but time. A rested dough absorbs water, relaxes gluten, and becomes easier to shape. Rushing the rest leaves the dough sticky and tight, and no amount of kneading fixes that. Let the dough rest, and it will reward you.
Give the dough at least 20 minutes after mixing, and another rest before shaping. The dough will feel smoother after each rest, and shaping will take less effort. Patience with rest gives a loaf that rises well and bakes light and airy every time.
Rescue a Wet Dough
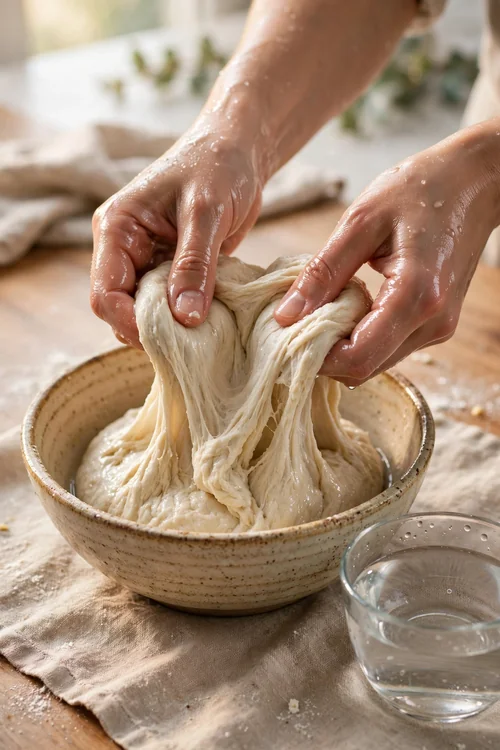
A wet dough can still be saved with folds and rest, so do not add flour yet. Stretch and fold builds strength without extra flour, and rest lets the flour absorb the water. Follow these steps to rescue a wet dough and shape it with confidence.
- Wet your hands and the bench scraper.
- Stretch one side of the dough up and fold it over.
- Turn the bowl and repeat on all four sides.
- Rest 20 minutes, then fold again.
- Repeat until the dough feels smooth.
Shape With Confidence
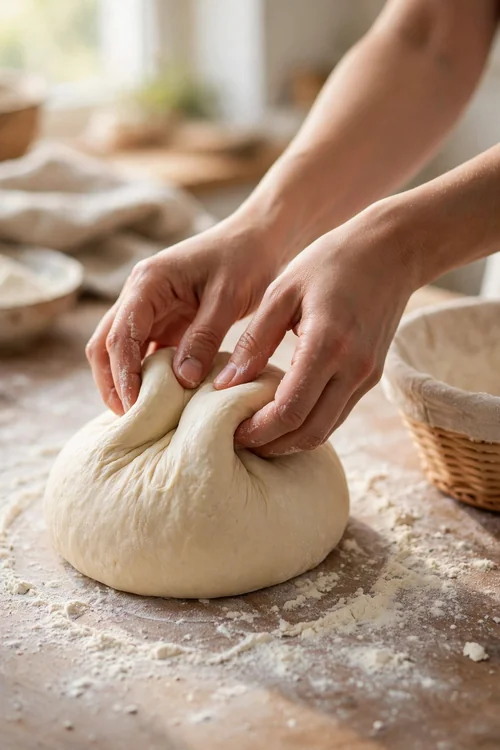
Quick Tip: Shape with light, quick hands. Slow, heavy handling deflates the dough, while fast, gentle touches keep the air inside.
Shaping is the last step before the rise. A smooth, tight surface holds the loaf tall in the oven, while a loose shape spreads flat. Pull the dough toward you to build tension, then set it in the basket seam side up. The same dough will bake far better shaped with confidence.
Conclusion
Fixing sticky bread dough comes down to gradual water, wet hands, and patient rests. Those three habits give smooth, workable dough. Once they are routine, easy dough takes no extra effort.
Take the fixes one at a time, and your next batch will show a clear improvement. Write down what worked, so the fix gets faster every time you cook.
Rest often, and resist the urge to add flour. For another dough that fights back when stretched, see the sponge cake fixes, then shape your loaf with full confidence every time.