Why Does My Pumpkin Pie Crack? Easy Fix Guide
A cracked pumpkin pie can feel like a ruined dessert, yet the flavor is usually perfect underneath. The crack forms when the custard puffs up too fast and then sinks as it cools. Most fixes come down to gentle heat, careful mixing, and patient cooling.
Oven heat is the biggest culprit. A very hot oven makes the outer filling set while the center keeps expanding, and that tension splits the top. A moderate temperature, a filled pan that is not overfilled, and a calm bake give the custard time to set evenly.
This guide walks through each fix in order, from pan choice to cooling. If you also bake fall loaves, the pumpkin bread guide covers a similar texture rescue.
Why Pies Crack

Custard pies crack because steam and expanding air push against a surface that has already set. When the oven runs hot, the edges firm up first and the middle keeps rising. As the pie cools, the center falls and the tight surface splits along the weakest line. A sudden move to a cold counter makes the split worse.
Overbeating adds air that swells in the heat and then collapses. Overfilling the shell leaves no room for that gentle rise. In my experience, a calm filling and a moderate oven prevent most cracks before they start.
Pick The Right Pan
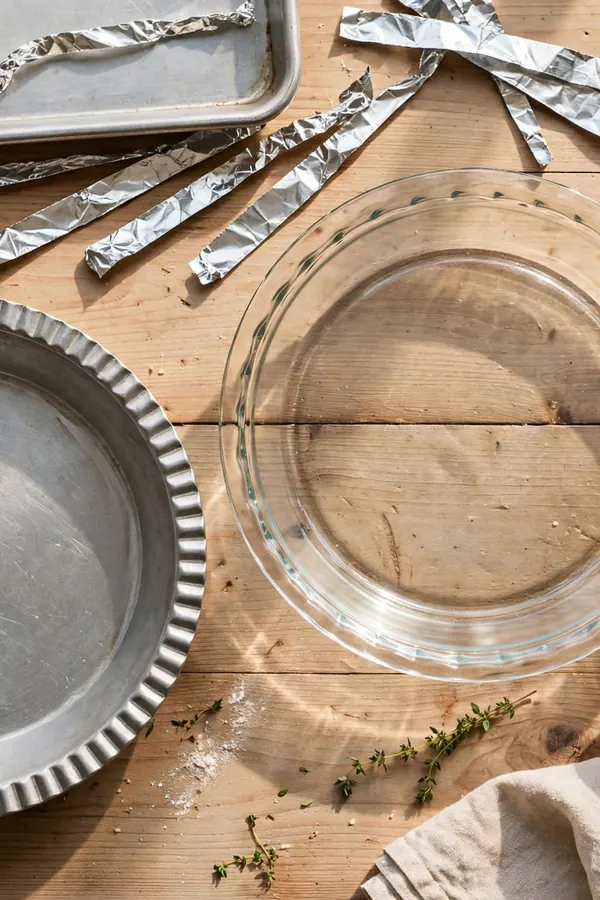
A good pan spreads heat evenly and keeps the crust from browning before the custard sets. Shiny metal, glass, and ceramic all behave differently, so pick with your oven in mind. Check your oven with a thermometer, since many ovens run hotter than the dial shows.
- Use a standard 9 inch metal or glass pie plate for even baking.
- Skip dark nonstick pans unless you lower the heat by 25 degrees.
- Place the pie on a preheated baking sheet to set the bottom crust fast.
- Keep the rack in the lower third so the top browns slowly.
- Fill the shell only three quarters full to leave room for a gentle rise.
Mix Filling Gently

Quick Tip: Stir the filling only until the eggs disappear into the pumpkin. A few small streaks are fine. Extra beating whips in air that later swells and cracks the top.
Whisk the pumpkin, sugar, and spices first, then add the eggs last. Fold with slow strokes and stop as soon as the mixture looks smooth. Let the filling rest for five minutes so bubbles rise and pop before you pour. Pour slowly into the shell so you do not trap new air.
Bake Low And Slow

Common Mistake: Baking at 425 degrees for the whole time. That blast of heat sets the top quickly while the center stays liquid, and the trapped steam has nowhere to go. The result is a deep split down the middle.
The Fix: Start at 425 degrees for only 10 minutes to set the crust edge, then drop to 325 or 350 degrees for the rest of the bake. The custard firms up gently without puffing.
Watch the pie rather than the clock. A gentle jiggle in the center means it is done. Residual heat finishes the job while the pie rests on the counter. Pull the pie while the center still wobbles softly, and let it rest on the counter for an hour before moving it.
Watch For Doneness

What You Need:
- Pie plate: A 9 inch plate gives the custard room to set evenly.
- Baking sheet: A hot sheet under the pie crisps the bottom crust.
- Aluminum foil: A foil ring shields the crust edge from overbrowning.
- Instant read thermometer: Pull the pie near 170 degrees for a silky set.
- Wire rack: Airflow under the pie keeps cooling slow and even.
Set these tools out before you mix the filling. A calm, organized bake beats a rushed one every time, and your crust will thank you. A thermometer removes the guesswork, since the center should read near 170 degrees. A foil ring shields the edge while the pie cools slowly on a rack.
Cool Pies Gradually

Before: The filling was beaten until foamy, poured into a dark pan, and baked at high heat until firm. The top looked smooth in the oven, then split wide open on the counter as it cooled.
After: The filling was stirred gently, baked at a moderate temperature, and pulled while the center still wobbled. It cooled slowly on a rack and stayed smooth from edge to edge.
The difference is patience, not skill. Lower heat and slower cooling let the custard contract without tearing, so the finished pie looks as good as it tastes. Turn the oven off and crack the door for ten minutes before moving the pie to a rack. That gentle step keeps the surface smooth.
Prevent Oven Surprises

Do This:
- Bake at a moderate temperature after a short hot start.
- Pull the pie while the center still jiggles softly.
- Cool the pie on a rack away from cold drafts.
- Cover cracks with whipped cream if one still appears.
Avoid This:
- Do not beat the filling until foamy.
- Do not bake until the center looks fully firm.
- Do not move a hot pie into the fridge.
- Do not slice while the pie is still warm.
Most cracks come from rushing one of these steps. Slow down, trust the jiggle test, and give the pie a full two hours to cool before slicing. Keep the pie away from cold drafts while it cools. A steady room temperature lets the custard firm evenly, so the top stays smooth.
Rescue Cracked Slices

Time Needed: About 1 hour baking plus 2 hours cooling.
Difficulty: Easy, once you know the jiggle test.
Cost: No extra cost, just temperature control.
Result: A smooth top with a creamy, even set.
The most useful habit is checking the pie five minutes early. Ovens vary, and a few degrees can be the gap between a smooth top and a split one. When in doubt, pull it early. A small crack hides easily under whipped cream, so an early pull beats a split top.
Fix Filling Texture

A smooth filling starts with the right dairy and a gentle hand. Use evaporated milk or cream, since thin milk leaves the custard watery and dull. Warm the dairy slightly, then stir it into the pumpkin. Strain the mix through a fine sieve to catch egg strands and spice lumps.
Bake gently and take the pie out while the center still trembles. High heat curdles the eggs and turns the filling grainy. Chill the baked pie four hours so the custard firms into a silky slice. A calm bake and a chill give the smooth texture you want.
Serve Without Stress

A chilled pie serves itself when you plan the final hour well. Slice with a calm hand, plate each piece neatly, and add the garnish only at the very end. These steps keep serving easy and the whole table calm.
- Chill the pie until fully cold so each slice holds its shape.
- Warm a sharp knife under hot water, dry it, and cut one clean slice at a time.
- Lift each slice with a wide spatula onto a cool plate.
- Add whipped cream and a pinch of cinnamon right before serving.
Plan Next Bake

Quick Tip: Chill the pie uncovered for the first hour so steam escapes, then cover loosely. Trapped steam can soften the crust and dull the top. A loose cover keeps the surface smooth.
Plan the bake a day ahead when you can. A fully chilled pie slices cleanly, holds its shape on the plate, and lets the spice flavor deepen overnight in the fridge. Note the temperature and time that worked, so the next pie turns out just as smooth. Small notes make every holiday bake easier.
Conclusion
A cracked pumpkin pie is almost never a lost dessert. The flavor stays rich, the custard stays creamy, and a simple topping hides any line that survives. The real fix is gentle heat, a calm filling, and slow cooling, and those three habits work for every custard pie you bake. For another classic fruit pie rescue, the apple pie guide shows how to keep the filling thick and the crust crisp.
Bake a day ahead when you can. A chilled pie slices cleanly and serves beautifully. Keep the oven gentle and the cooling slow, and every pie will look as good as it tastes.